The three steps
1
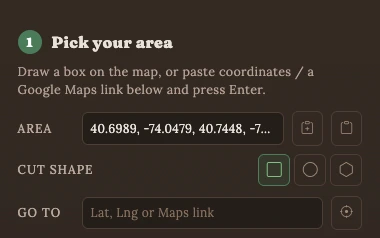
Box the area
Click once to start, move, click again to finish. Or paste a
Google Maps URL into the Area field and press enter — a box
appears around that spot. A single lat/lng gives you roughly a
one-mile box.
Cut shape: rectangle, circle or hexagon. Standard accounts go up
to 10 × 10 miles.
2
Dial the layers
Pick laser cut or 3D print first — every setting below follows
that choice. Then toggle buildings, roads, water, parks and rail,
and set your sizes in millimetres.
Preview as many times as you want. Previews are free.
3
Generate, then cut
One credit is spent here — three if terrain elevation is on.
Downloads are free and unlimited afterwards, and the job stays in
My Maps.
Dense city blocks take a few minutes. Elevation takes longer.
Picking an area
The box you draw is the map. Everything else — how long it takes, how
busy it looks, how much of it survives the cut — follows from how much
ground you put inside it.
Draw it, or paste it
A Google Maps link, a lat/lng pair, or two clicks on the map. Hold Shift while dragging for a perfect square.
Rectangle, circle or hexagon
The cut shape changes the outline of the finished piece, not the data inside it.
Up to 10 miles per side
One to two square miles is the sweet spot — enough streets to recognise, few enough to cut cleanly.
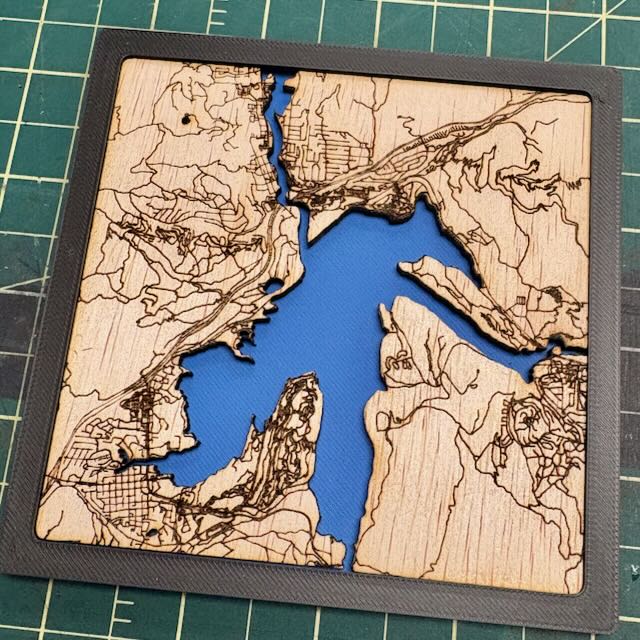
Where there's a coast, the shoreline becomes the cutline
The piece takes the shape of the land instead of the shape of your box.
Layers
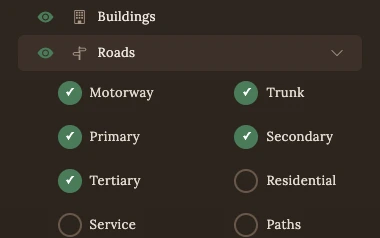
Roads expand into ten types so you can keep the arterials and drop the
driveways. On a dense city, residential and service are usually what
turn a map into mush.
Roads
Motorway, trunk, primary, secondary, tertiary, residential, service,
paths. Bridges and tunnels are export-only toggles — the preview
always draws them.
Motorway
Trunk
Primary
Residential
+6 more
Water
Rivers, lakes, coastlines, canals. Where there's a coast, the
shoreline becomes the cutline, so the piece takes the shape of the
land.
Buildings
Every footprint in the box. Use Min Building Size to drop sheds and
garages before they clog the engrave.
Elevation
Beta
Contour lines on the laser, real terrain on the print. Three
credits, and slower to generate.
Sizes and line widths
Everything is set in real-world units, so what you type is what comes
off the machine. Set the finished size first, then the widths.
Thin lines on thick stock burn through. If a preview looks right but the
cut falls apart, widen the base line before you touch anything else.
What you get
One generate produces every file for the mode you picked. Nothing is
held back for a higher tier.
SVG
Grouped layers, editable in Illustrator or Inkscape, and the file
LightBurn and Glowforge read happily.
DXF
Cut, score and engrave on separate colour-mapped layers, so xTool
Creative Space assigns the passes the moment it opens.
3MF
A 2 mm base plate with raised roads and buildings and recessed
water, split into objects your slicer can assign filaments to.
Every job also ships an attribution file. Copy it into your listing and
you're covered.
Cleaning up a busy map
If the preview looks like a scribble, or the cut takes forty minutes,
these five settings are what you reach for.
When something looks wrong
Generation is crawling
Shrink the box, turn elevation off, raise simplify tolerance, drop
the smaller road types.
Too complex for the laser
Raise every minimum-size filter, set simplify to 2–5 m,
turn off footways and park paths.
Something's missing
Check the feature exists in the source data, lower your
minimum-size filters, and make sure that layer is on.